For web-based UI
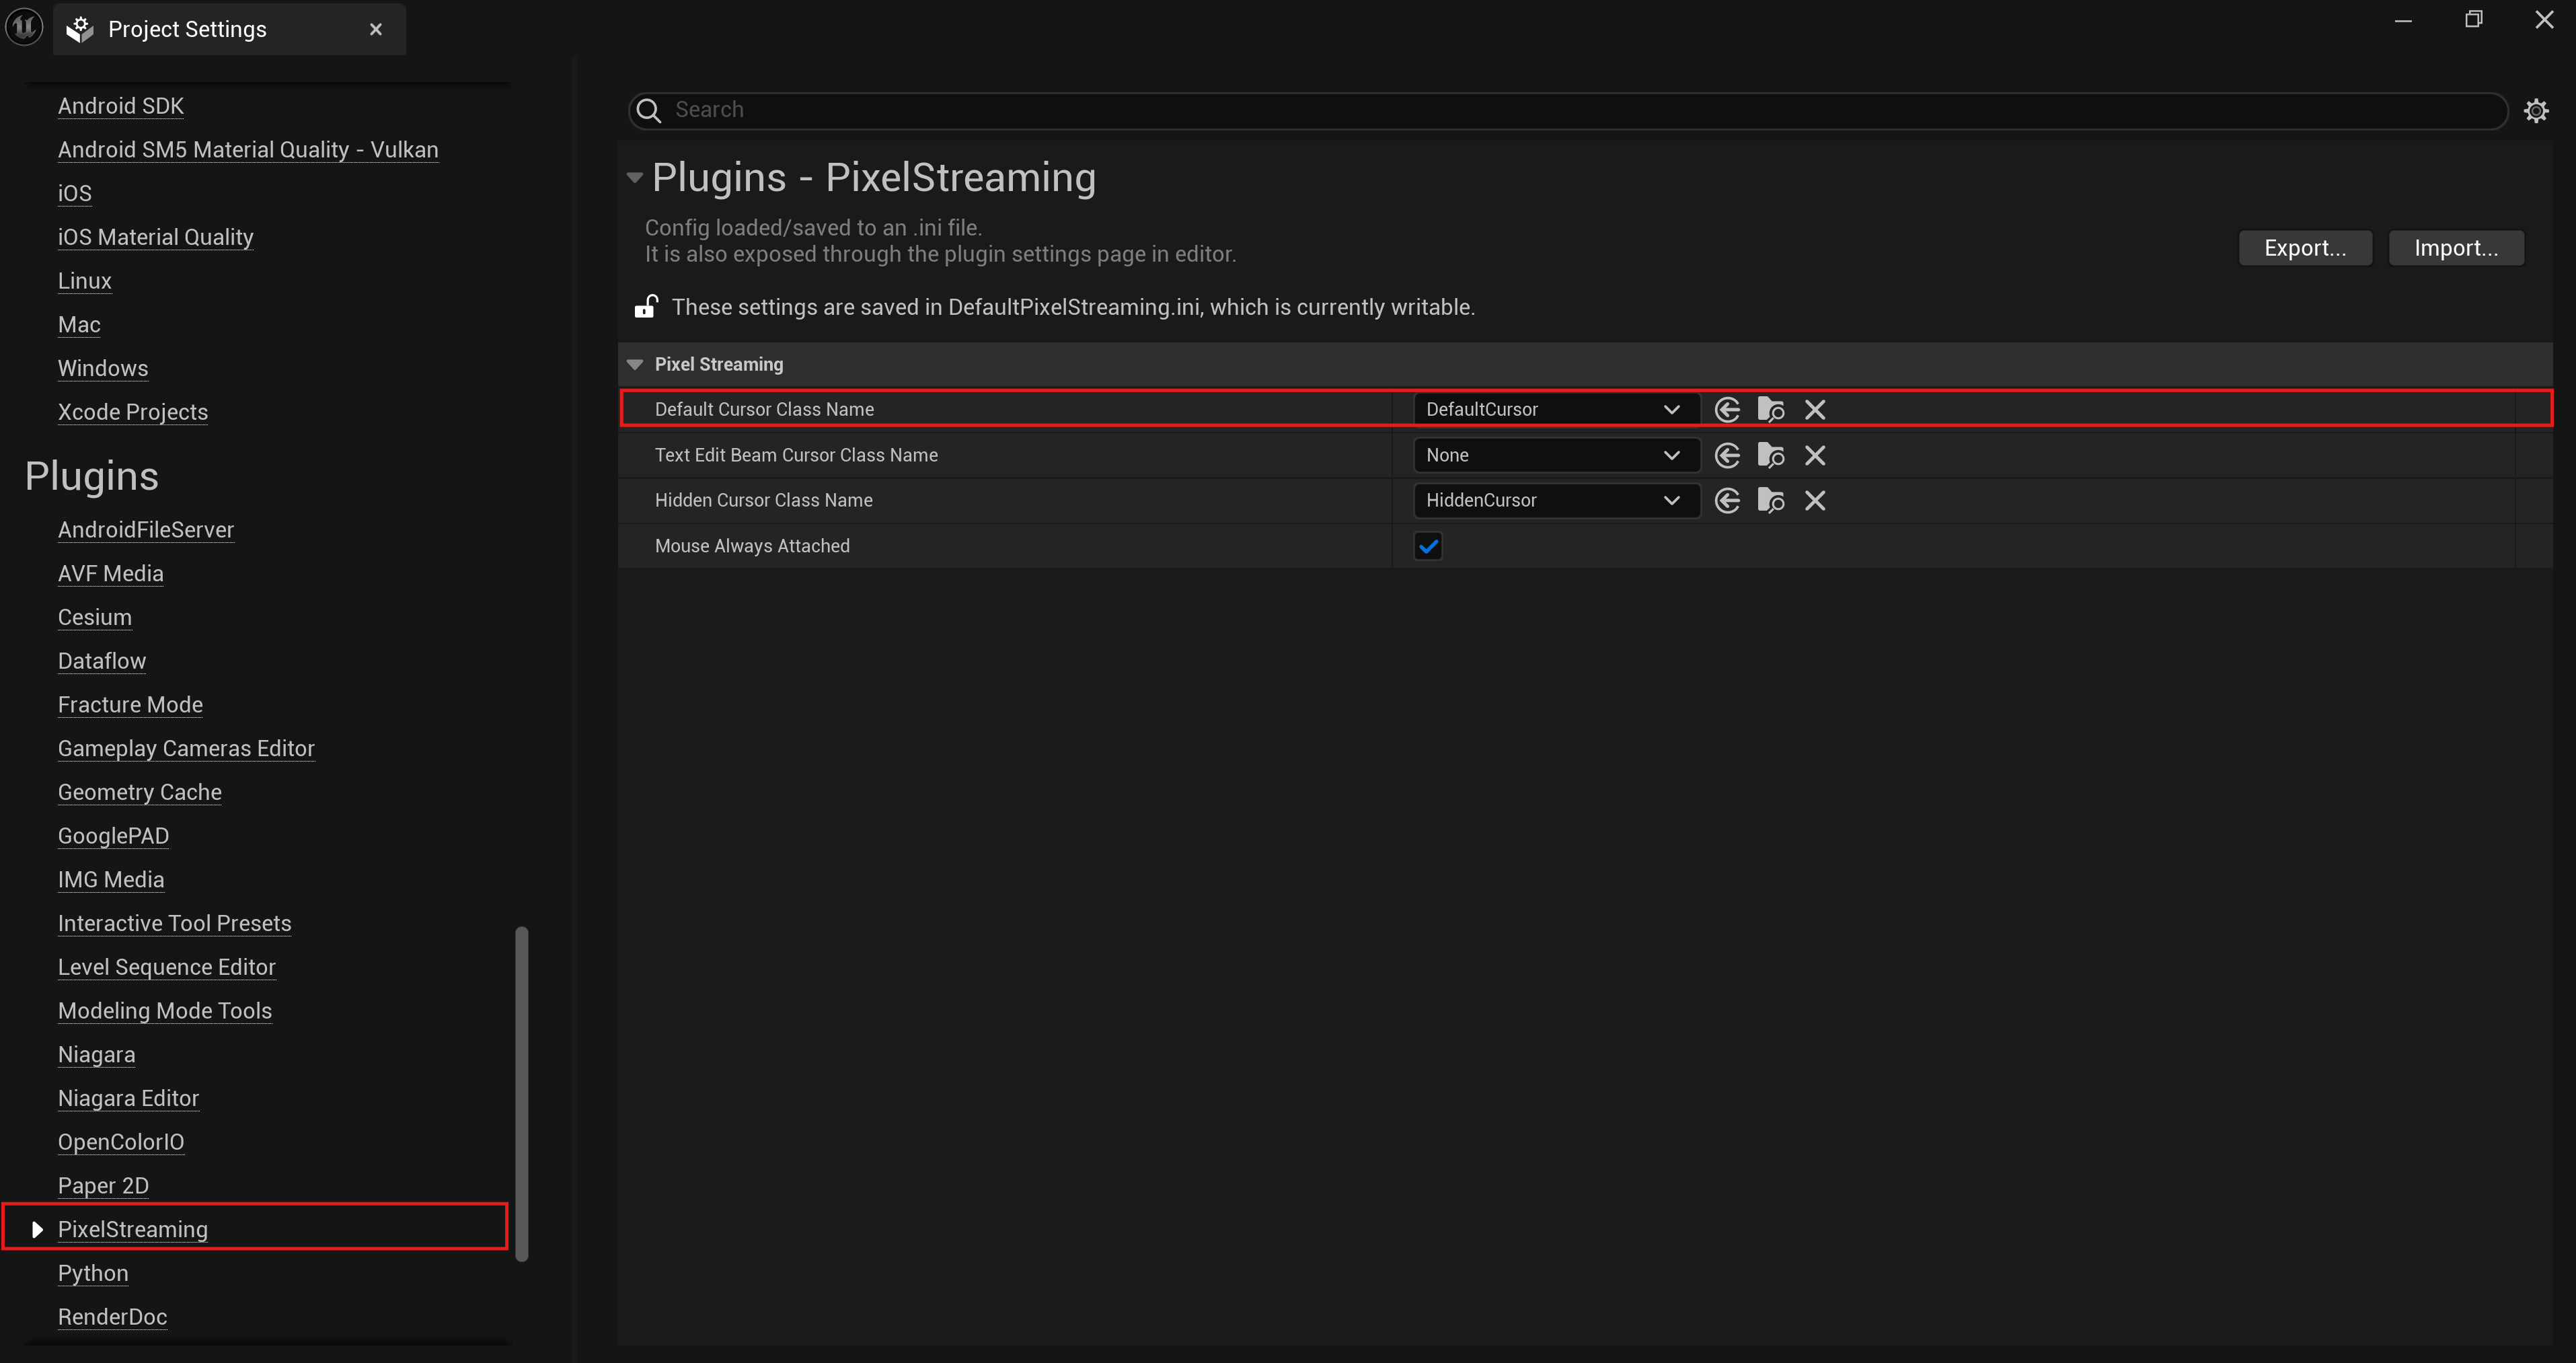
Hide Unreal’s cursor and let the browser handle it.Hide Unreal’s cursor
1
Open Pixel Streaming plugin settings
Project Settings → Plugins → Pixel Streaming.
2
Set Default Cursor Class Name to HiddenCursor
Stops UE from drawing a second cursor.

Mouse capture and lock
1
Open Edit → Project Settings → Engine → Input
Engine Input settings.
2
Set Default Viewport Mouse Capture Mode
Capture Permanently Including Initial Mouse Down.3
Set Default Viewport Mouse Lock Mode
Do Not Lock.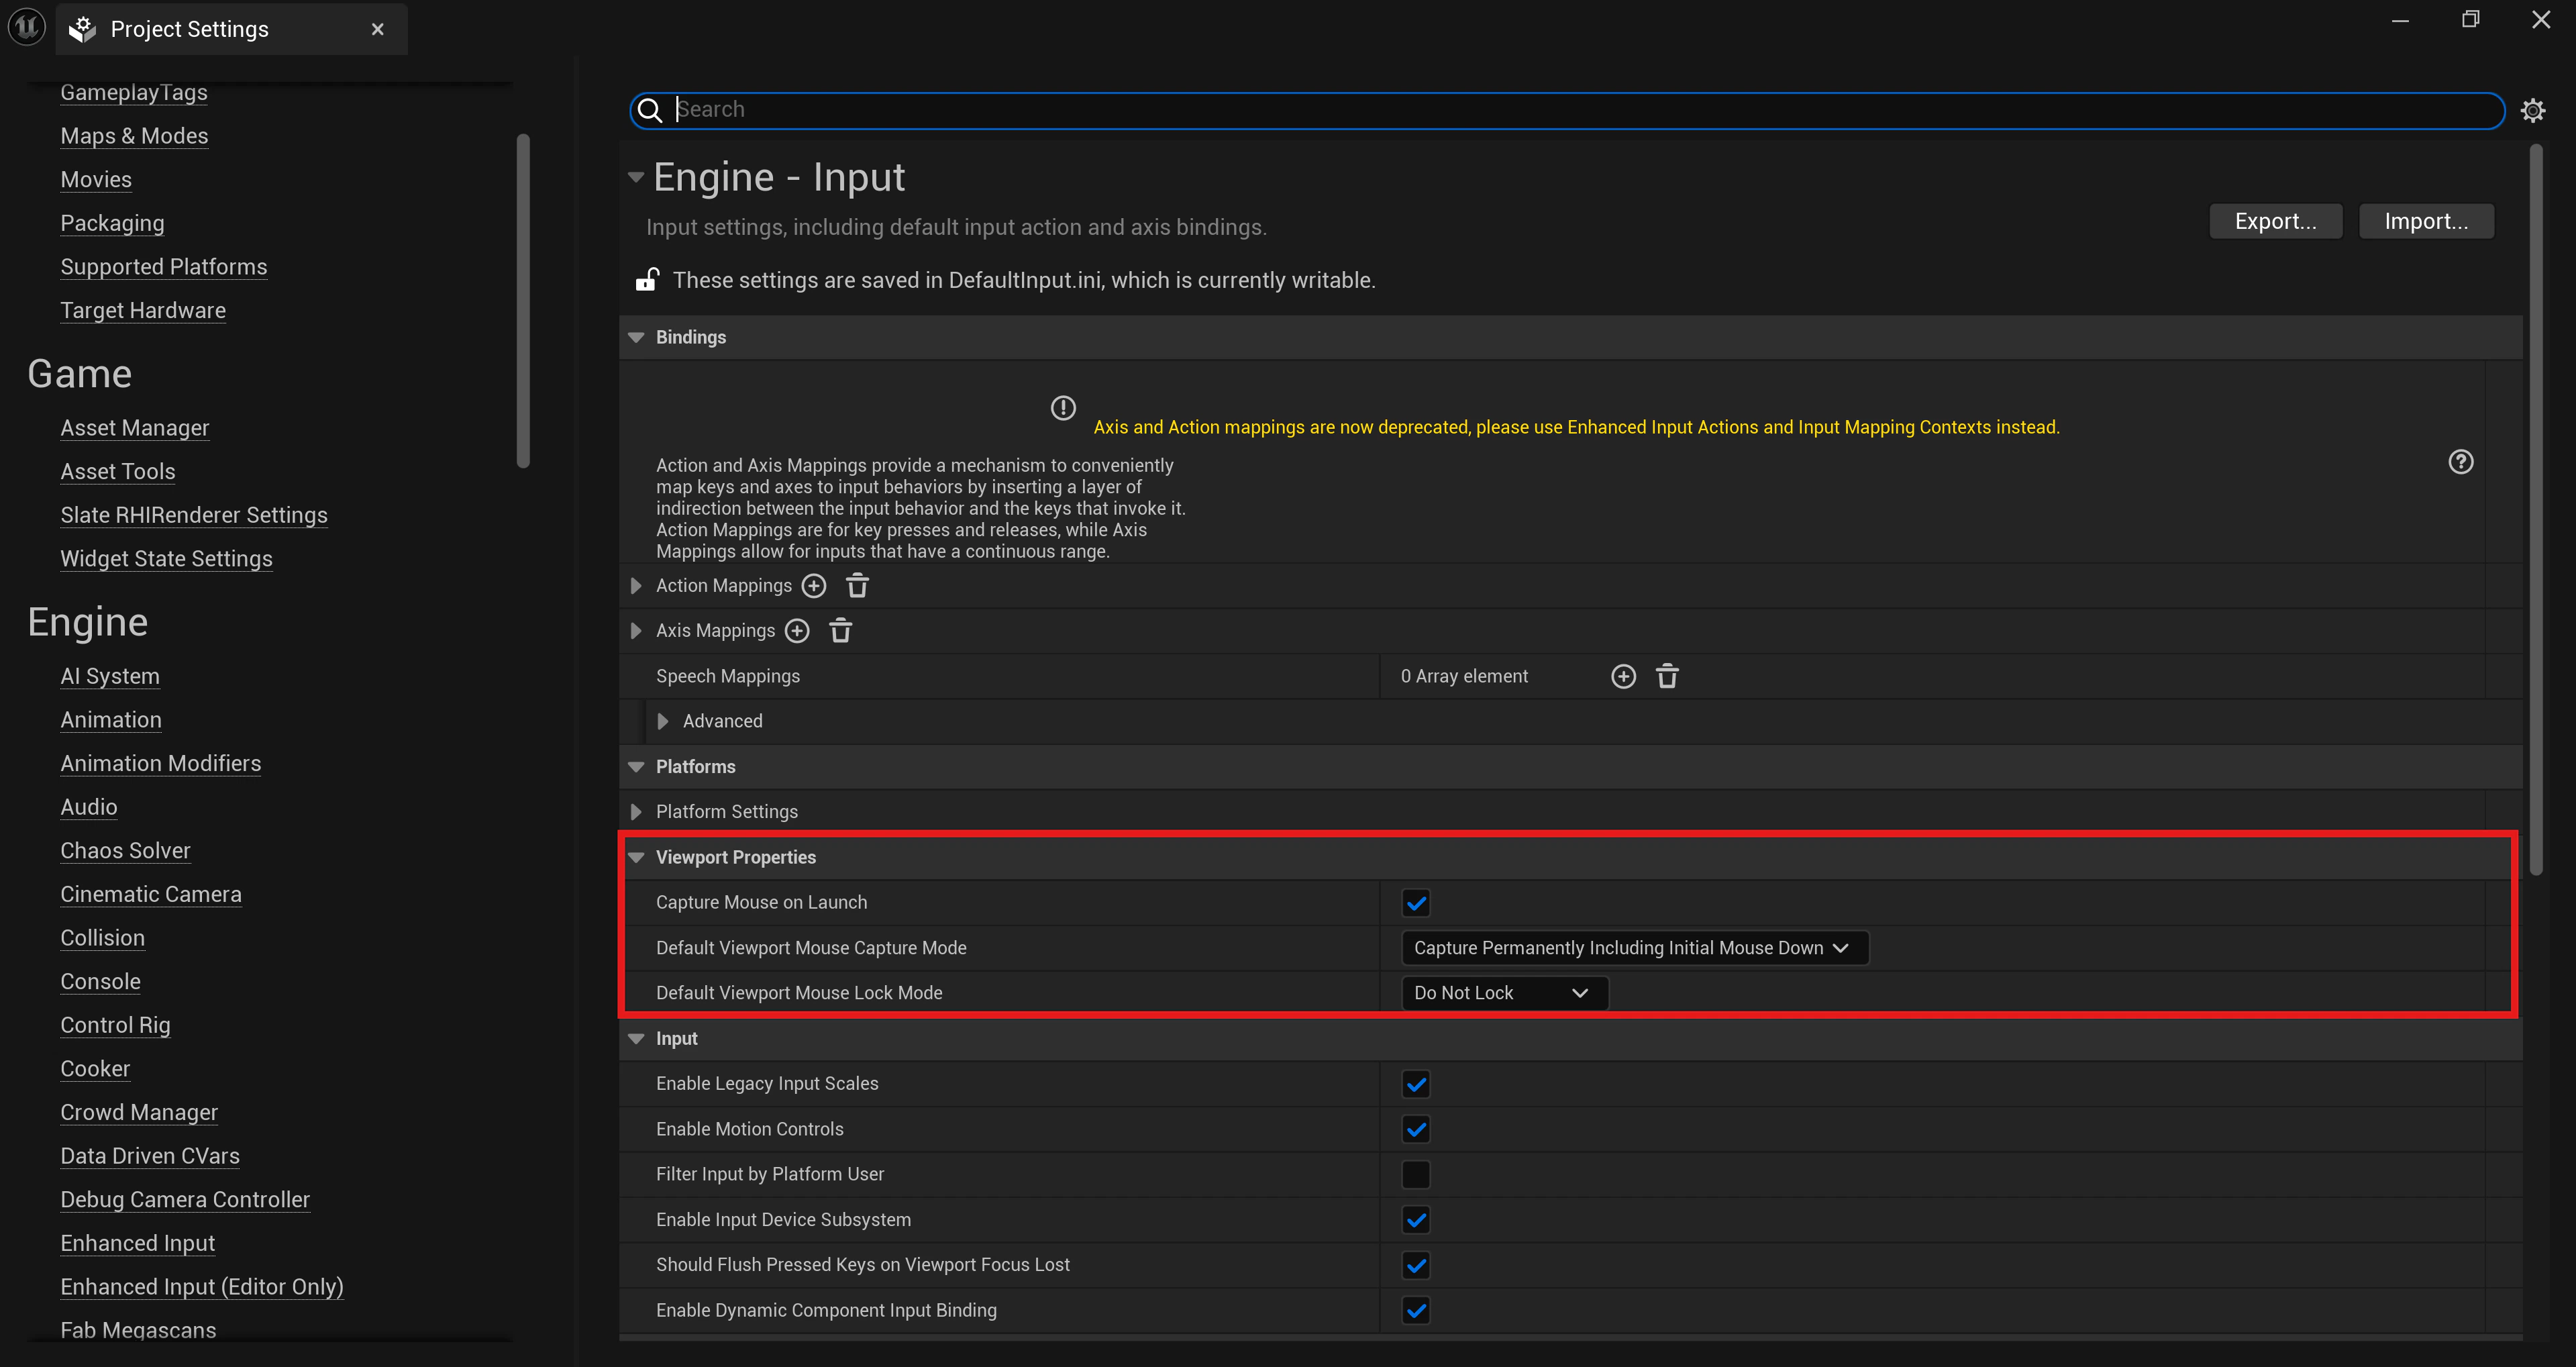
Disable Hovering Mouse in Streampixel
In the dashboard, set Project Settings → Hovering Mouse → Disabled so the browser’s native cursor stays active.For in-game (Unreal) UI
Show Unreal’s cursor and lock it inside the viewport.Show Unreal’s cursor
In the Pixel Streaming plugin, set Default Cursor Class Name toDefaultCursor.
Lock the cursor
1
Edit → Project Settings → Engine → Input
2
Default Viewport Mouse Capture Mode
Capture Permanently Including Initial Mouse Down.3
Default Viewport Mouse Lock Mode
Pick one:
Lock On Capture, Lock Always, or Lock in Fullscreen.Toggle cursor visibility at runtime
Switch between hidden and visible based on game state — e.g. hide during gameplay, show in menus.From Unreal
Send a JSON message viaSend Pixel Streaming Response:

From an iframe
UsepostMessage with the same JSON. See stream control commands.
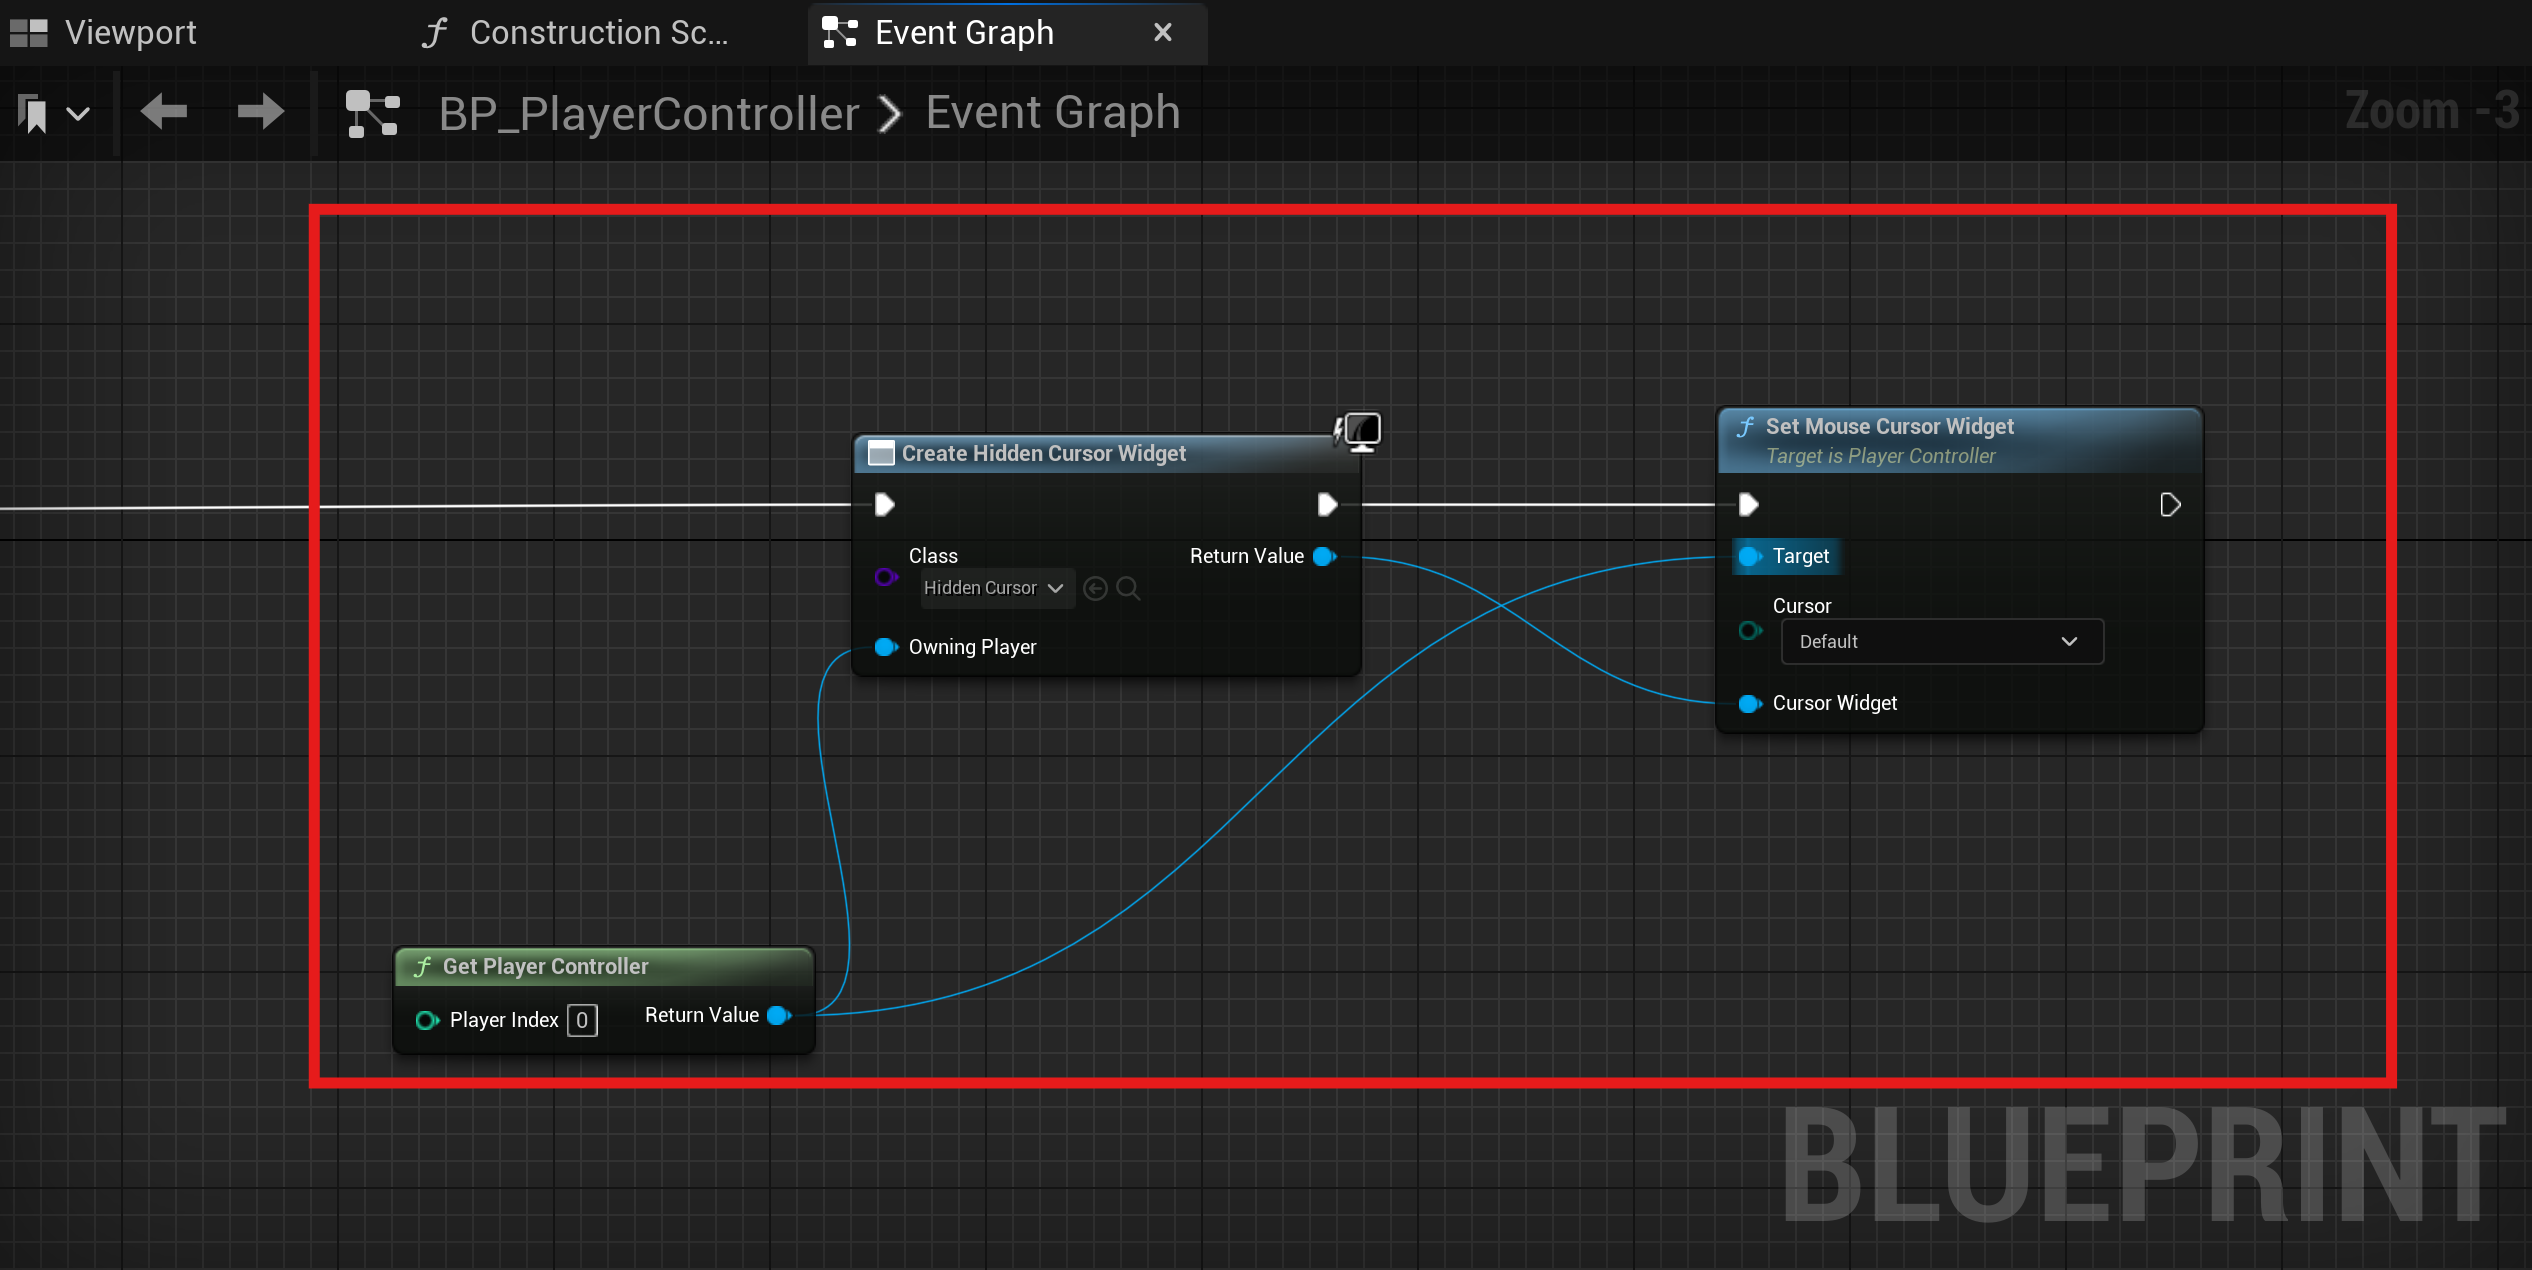
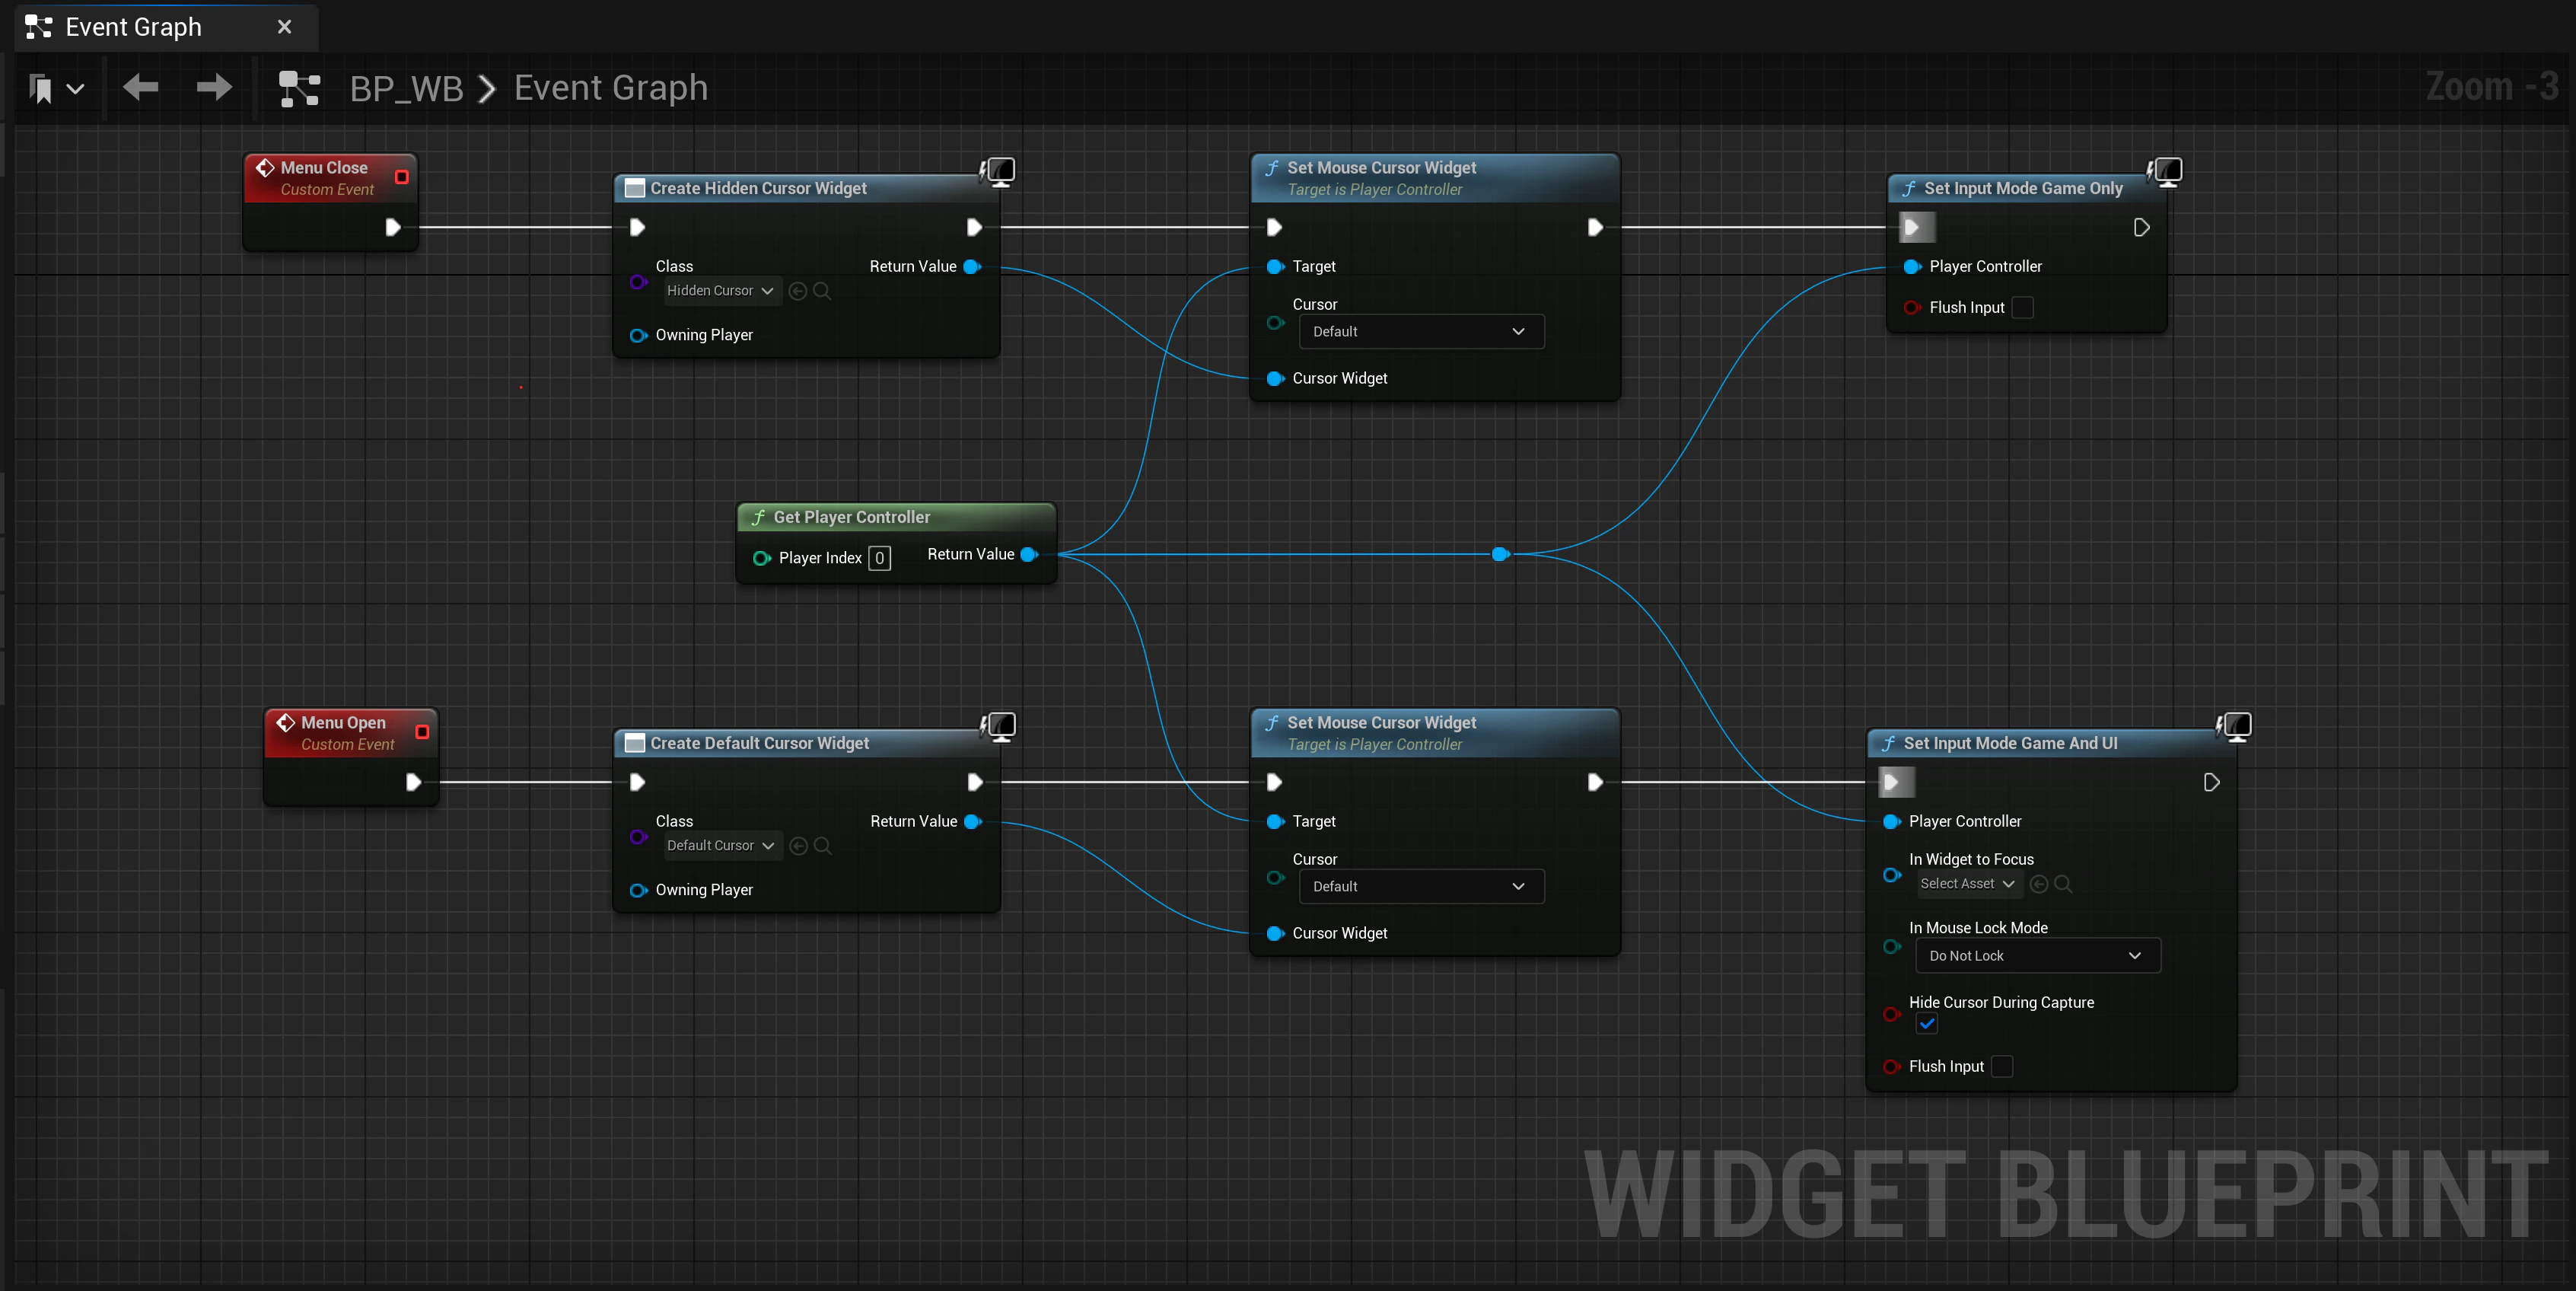
In-game menu cursors
Toggle cursor visibility from Blueprints:- HiddenCursor to hide
- DefaultCursor to show
- Set Input Mode Game Only — gameplay
- Set Input Mode Game and UI — menus